위젯의 주요 3요소는 다음과 같다.
1. configuration 2. provider 3. entryView Provider
이 아티클을 읽어보면 이해가 갈수 있는데, widget의 경우에는 계속해서 활성상태로 가있는것이 아니다.
즉 메모리에 항상올라와있는것이 아니며, 반면 계속해서 업데이트 되어야 하는데
이때 사용하는 방법이 TimeLineProvider와 TimeLine이다.
즉
위젯이 계속해서 로드되어 있다면, 시스템 리소스와 네트워킹 그리고 베터리 소모가 크기 때문에 이를 막기 위해서 요청하는 업데이트의 빈도와 횟수를 제한하기 위한 객체이다.
Timeline
타임라인은 기본적으로 위젯이 언제 업데이트 될것인지에 대한 정보이다.
앞서 말했듯 위젯은 항상 업데이트가 자동으로 되는것이 아닌 타임을 정해서 해당 타임에만, 뷰가 업데이트 된다.
이 정보를 담고있는 객체가 Timeline이다.
policy
policy는 이름답게 타임라인이 되었을 때 어느시점에서 업데이트 될지를 정하는 파라미터이다.
- atEnd : 현재 타임라인이 마지막 타임라인이면 다시 타임라인을 요청
- after : 해당 date(명시적 시점) 후에 타임라인을 요청
- never : 가능하면 계속해서 요청
TimelineProvider
Provider는
- placholder()
- getSnapshot()
- getTimeline()
이 세가지 메소드를 통해서 위젯에 대한 데이터를 가져온다.
## getSnpashot() snapshot은 위젯의 현재 상태를 나타내는 스냅샷을 가져온다. 이것을 통해서 위젯갤러리(위젯을 추가할때 나오는 상태에서 ) 보여지게 된다. ## getTimeLine() getTimeline은 언제 위젯이 업데이트 될것인지에 대한 타임라인을 가져온다. ## placeholder() placeholder는 위젯이 한번도 렌더링 된적이 없을때, 보여지는 뷰를 의미한다. 해당 뷰는 어디 다른곳에서 네트워킹을 받거나 하는것이 아닌, TimeEntry를 즉각적으로 반환하기 때문에, 초기 설정화면이라고 생각하면 이해가 쉽다. 즉, 위젯 설치하는 위젯갤러리에서 최초로 보여질 위젯의 모습이다. 샘플코드
struct Provider: IntentTimelineProvider { func placeholder(in context: Context) -> SimpleEntry { SimpleEntry(date: Date(), configuration: ConfigurationIntent()) } func getSnapshot(for configuration: ConfigurationIntent, in context: Context, completion: @escaping (SimpleEntry) -> ()) { let entry = SimpleEntry(date: Date(), configuration: configuration) completion(entry) } func getTimeline(for configuration: ConfigurationIntent, in context: Context, completion: @escaping (Timeline<Entry>) -> ()) { var entries: [SimpleEntry] = [] // Generate a timeline consisting of five entries an hour apart, starting from the current date. let currentDate = Date() for hourOffset in 0 ..< 60 { let entryDate = Calendar.current.date(byAdding: .hour, value: hourOffset, to: currentDate)! let entry = SimpleEntry(date: entryDate, configuration: configuration) entries.append(entry) } let timeline = Timeline(entries: entries, policy: .never) completion(timeline) } } 
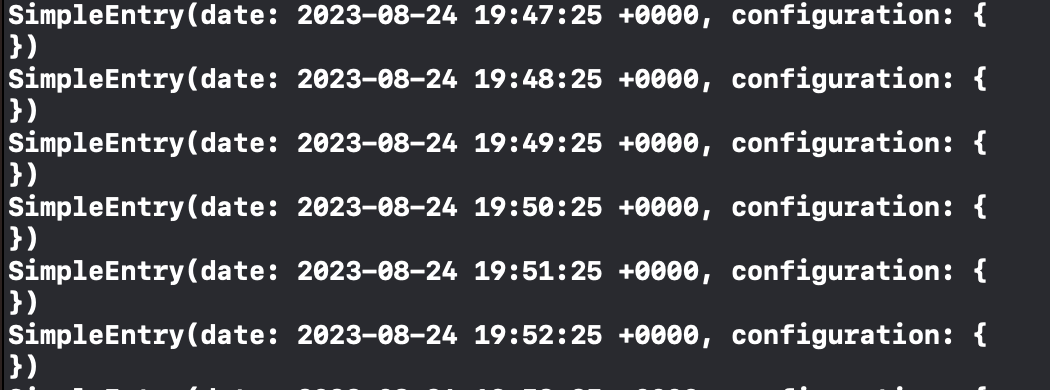
나는 개인적으로 시간앱이기 때문에 1시간을 60분으로 나눠서 분당 업데이트가 되도록 설정하였다.
여기에서 Calendar.current.date(byAdding: .hour, value: hourOffset, to: currentDate)! 가 현재 시간을 기준으로 byAdding 에 .min을 넣엇기 때문에 분당으로 세팅이 된다.
여기에서 houroffset의 갯수는 그냥 몇개의 요청을 미리 넣어두는가 이며, 해당 timeline이 끝나면 다시 요청을 받아서 쓰거나 혹은 계속해서 요청을 받거나 하는데 그것이 바로 policy이다.
WidgetCenter
앱내에서 위젯의 현재 타임라인에 관련된 영향을 미쳤을 때, 즉, 앱의 액션이, 위젯에 콘텐츠를 업데이트 하도록 할때 WidgetCenter를 사용하면 된다.
WidgetCenter.shared.reloadTimelines(ofKind: "com.mygame.character-detail") - ofKind는 제일 처음 configuration에서 정한 kind이다.
샘플코드
WidgetCenter.shared.getCurrentConfigurations { result in guard case .success(let widgets) = result else { return } // Iterate over the WidgetInfo elements to find one that matches // the character from the push notification. if let widget = widgets.first( where: { widget in let intent = widget.configuration as? SelectCharacterIntent return intent?.character == characterThatReceivedHealingPotion } ) { WidgetCenter.shared.reloadTimelines(ofKind: widget.kind) } } 참고로 나는 분당으로 변화하는 시간 어플이었기 때문에 매일 자정에 timeslice를 가져와야하고 해당 00:00부터 분당으로 나눠야 해서 60 * 24한 시간으로 설정된 코드를 사용하였다.
분당 변화하는 위젯 샘플코드
func getTimeline(for configuration: ConfigurationIntent, in context: Context, completion: @escaping (Timeline<Entry>) -> ()) { var entries: [SimpleEntry] = [] let currentDate = Date() let midnight = Calendar.current.startOfDay(for: currentDate) let nextMidnight = Calendar.current.date(byAdding: .day, value: 1, to: midnight)! for offset in 0 ..< 60 * 24 { let entryDate = Calendar.current.date(byAdding: .minute, value: offset, to: midnight)! let entry = SimpleEntry(date: entryDate, configuration: configuration) entries.append(entry) } let timeline = Timeline(entries: entries, policy: .after(nextMidnight)) completion(timeline) } '앱 > SwiftUI' 카테고리의 다른 글
| SwiftUI) Widget 위젯 만들기 - 프로젝트 생성(1) (2) | 2023.08.28 |
|---|---|
| SwiftUI) WidgetKit을 사용해서 Widget을 만들기(2) - configuration (0) | 2023.08.28 |
| SwiftUI) WidgetKit을 사용해서 Widget을 만들기(3) - EntryView (0) | 2023.08.28 |
| SwiftUI) WidgetKit을 사용해서 Widget을 만들기(4) - 앱에서 위젯으로 데이터 보내기 app Group (0) | 2023.08.28 |
| SwiftUI) WidgetKit을 사용해서 Widget을 만들기(4) - 앱의 데이터 변화를 위젯에서 감지하기 (0) | 2023.08.28 |